

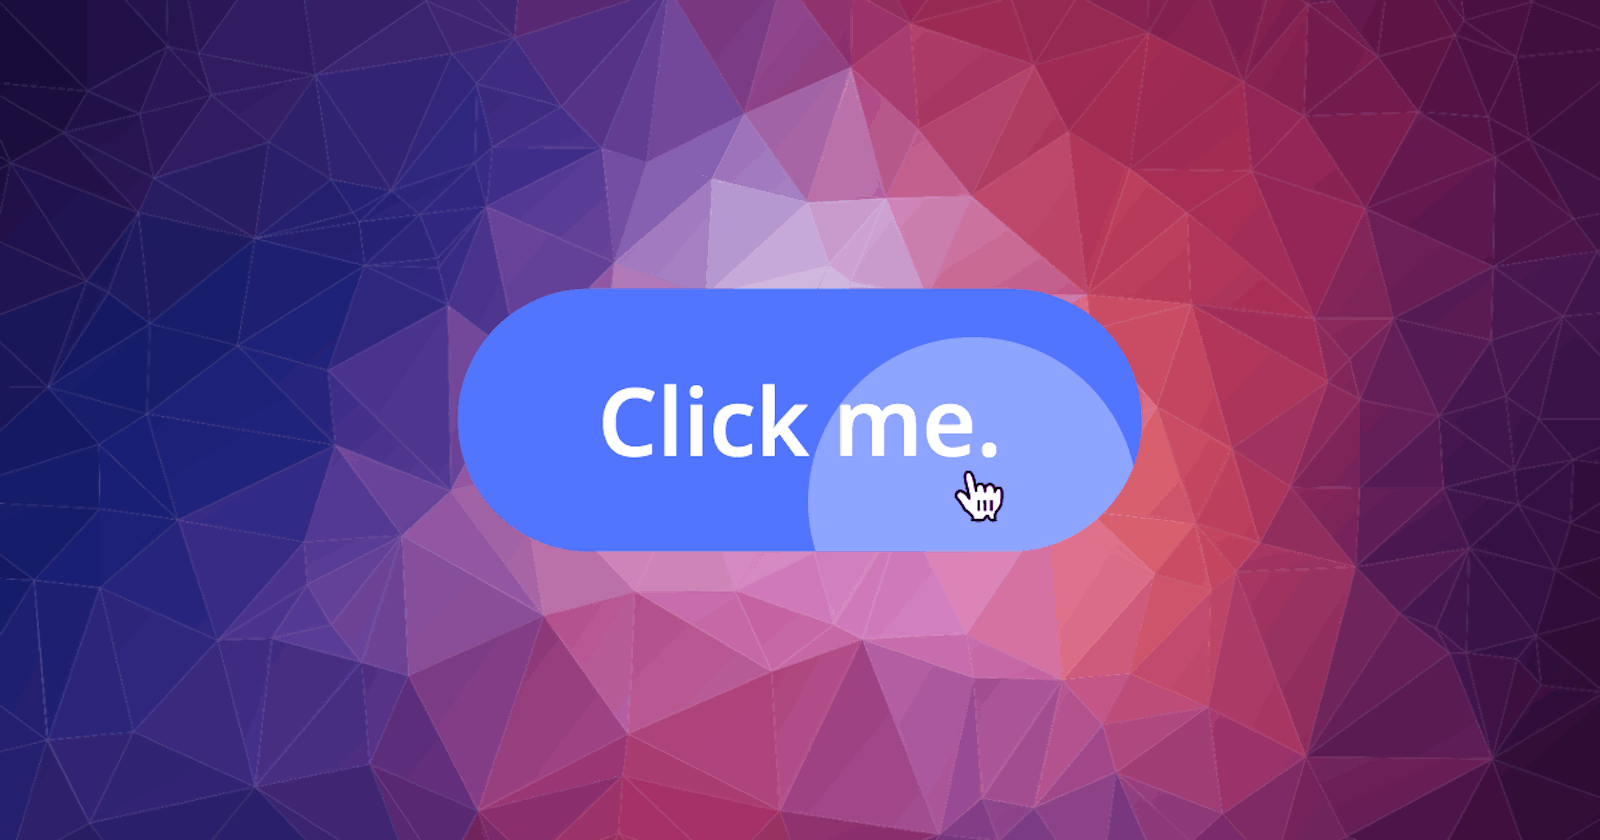

In this article, I'll show you how to add a ripple click effect to your buttons (much-inspired by Material Design's buttons ). 😀
This is a rather quick and easy effect that'll make your buttons pop a little! 🤩
Creating The Button
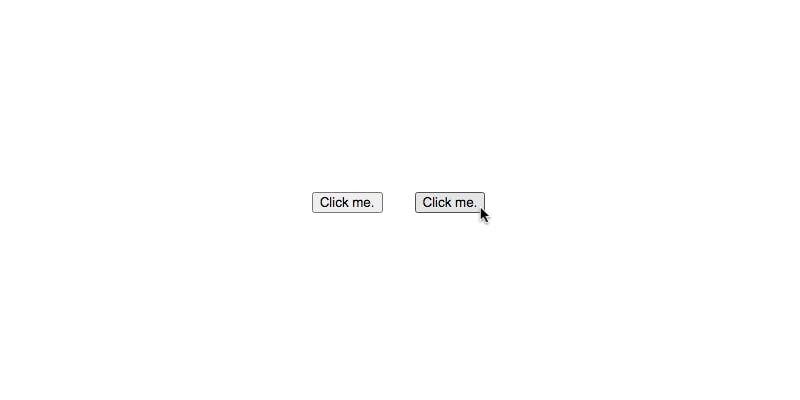
To start, create a button. That's it!
<button>Click me.</button>
Optionally, you can add a class to the button if you'd like to distinguish it from other buttons on a page.
<button class="btn">Click me.</button>
That gives us this:
Styling The Button
Next, we'll add some styles to the button to make it look nicer. These are the styles I'll add to mine:
button {
    border: none;
    border-radius: 10rem;
    padding: .5rem 3.25rem;
    background-color: #5175FF;

    color: white;
    font-size: 1.5rem;
    font-family: 'Kumbh Sans', sans-serif;
    line-height: 3.5rem;

    cursor: pointer;
    transition: .3s;
}
Also, I'll give the button a hover state.
button:hover {
    background-color: #829CFF;
}
This is what we have so far:

Two important styles that we'll need to add in order to make sure that our ripple click effect works are:
position: relative;
overflow: hidden;
That's because in a little while we'll be adding an element (which will be our ripple) inside of the button. That ripple will need to be positioned relative to the button and we only want it to be shown inside the button (not around it). 😉
Creating The Ripple
Before we actually create the ripple, we'll need to select our button and add an event listener to it to listen for when that button is clicked.
let btn = document.querySelector('button');
btn.addEventListener('click', createRipple);
As you can see, we'll be calling a function called createRipple whenever that button is clicked.
Let's make the createRipple function. We'll pass the event object that is created when the event listener is fired to the createRipple function and use it to do two things.
function createRipple(e) {
    let btn = e.target;
    let boundingBox = btn.getBoundingClientRect();
}
- First, we'll use the
targetproperty of the event object to bind the namebtnto the button itself. - Then, we'll use the
getBoundingClientRectto get a special object containing information about the position of the button relative to the viewport and bind it to the nameboundingBox.
The boundingBox.left and boundingBox.top properties will tell us how far from the left of the page the left side of the button is and how far from the top of the page the top side of the button is, respectively.
The following image from MDN web docs illustrates this quite nicely:
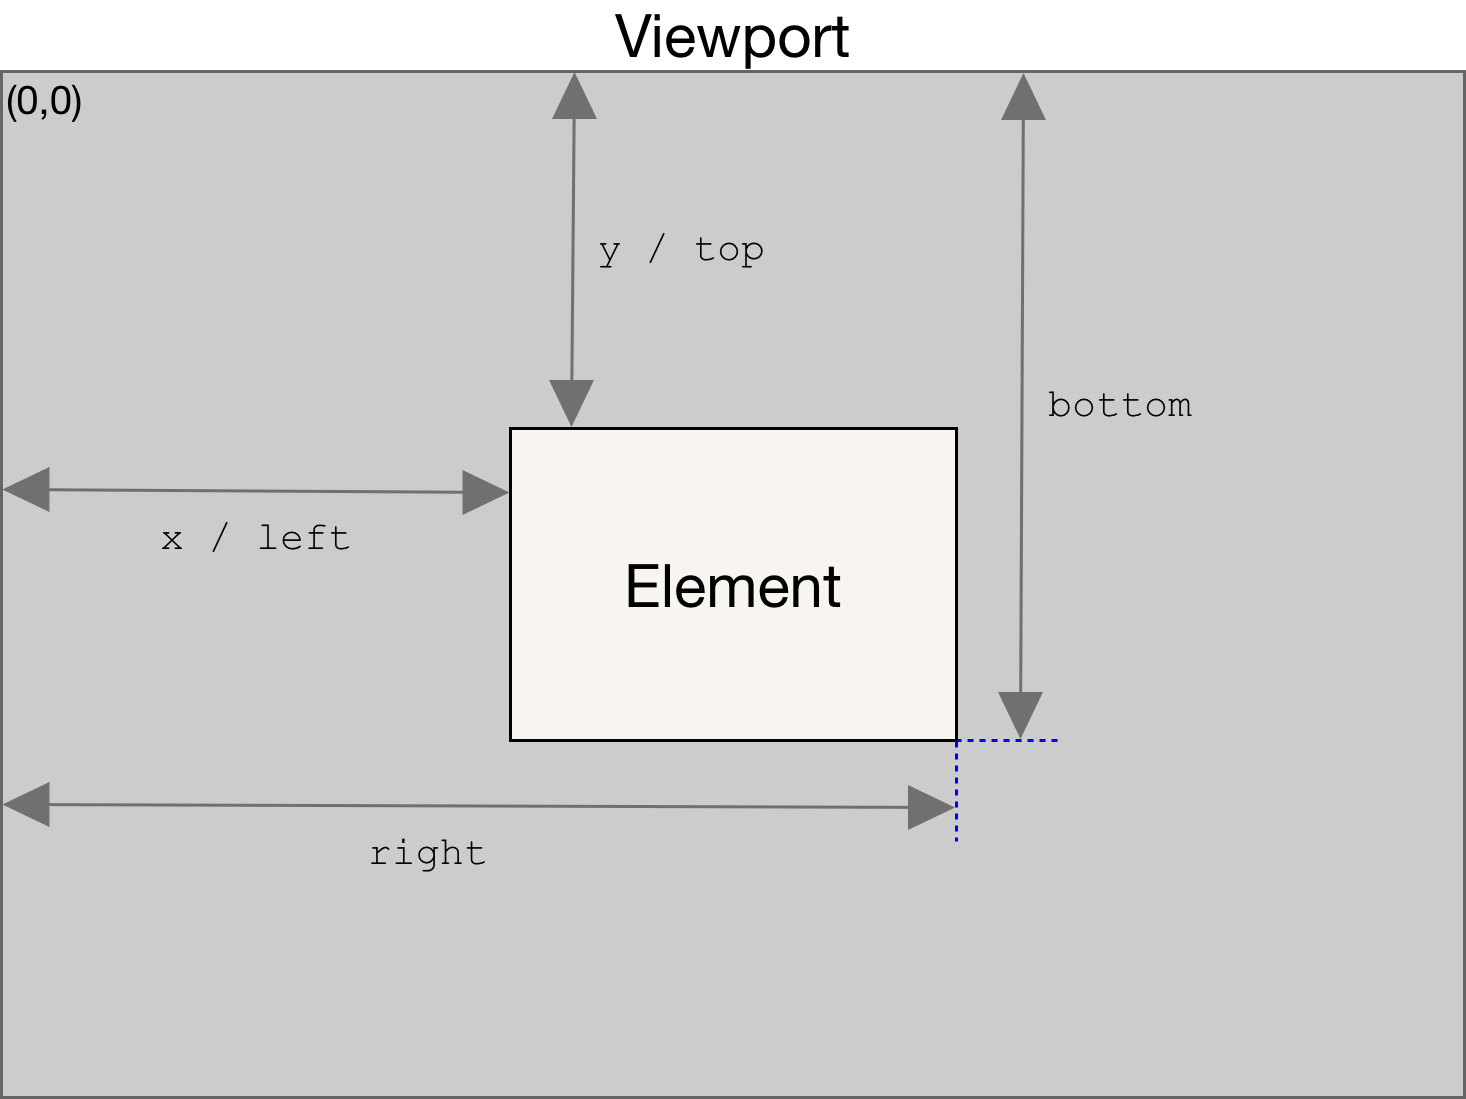
In contrast, the e.clientX and e.clientY properties tell us how from the left of the viewport and how far from the top of the viewport the cursor is, respectively.
This means that if we subtract the value of boundingBox.left from the value of e.clientX, we can find out how far to the right the cursor is from the left side of the button (and we can do the same for boundingBox.top and e.clientY to find out how far from the top of the button the cursor is).
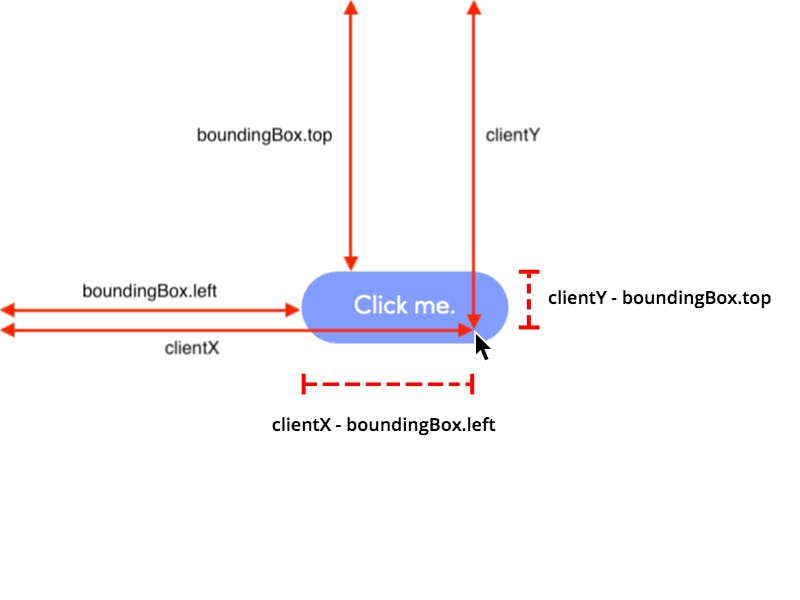
In other words, we can find out the position of the cursor relative to the button.
And that means we can create a ripple exactly where a user clicks on a button. 😆
Don't worry if you don't quite understand all of that math or viewport geography—the following snippet will grab the coordinates we need to create the ripple effect. 😅
let x = e.clientX - boundingBox.left;
let y = e.clientY - boundingBox.top;
Okay, now that we know where we want our ripple to positioned, let's actually create the ripple (which will be a simple <span>) using the createElement method. We'll add a class of ripple to that element and set it's left and top style properties to the x and y values we just acquired.
let ripple = document.createElement('span');
ripple.classList.add('ripple');
ripple.style.left = `${x}px`;
ripple.style.top = `${y}px`;
That'll create a <span> with the class of ripple and place it's top-left corner wherever we click on the button.
Lastly, we just need to add the ripple as a child element of the button.
btn.appendChild(ripple);
Altogether, the createRipple function should look something like this:
function createRipple(e) {
    let btn = e.target;
    let boundingBox = btn.getBoundingClientRect();
    let x = e.clientX - boundingBox.left;
    let y = e.clientY - boundingBox.top;

    let ripple = document.createElement('span');
    ripple.classList.add('ripple');
    ripple.style.left = `${x}px`;
    ripple.style.top = `${y}px`;

    btn.appendChild(ripple);
}
Styling The Ripple
Now that we've set up a function to add a ripple to our button every time it is clicked, let's add some styles to that ripple.
We'll make it round, give it a background color, and make it somewhat transparent:
.ripple {
    border-radius: 50%;
    background-color: white;
    opacity: .5;
And then we'll make sure that rather than it's top-left corner being at the position of where we click on the button, it's center is at the position of where we click on the button instead. Also, initially, the ripple should have a width and height of 0.
    position: absolute;
    transform: translate(-50%, -50%);
    width: 0;
    height: 0;
Finally, let's make sure that clicking on the ripple doesn't interfere with clicking on anything else, and let's also add a CSS animation (that we'll create next).
    pointer-events: none;
    animation: ripple .5s linear;
}
Animating The Ripple
Okay, we're almost done! 😆 We just need to add an animation that will occur when the ripple is first created and added to the button.
@keyframes ripple {
    to {
        width: 15rem;
        height: 15rem;
        opacity: 0;
    }
}
That'll increase the width and height properties of the ripple, (which will make it grow larger) and decrease its opacity to 0, (which will fade it out of view).
Oh, and one more thing! Let's remove the ripple from the button once the animation is complete so that we don't end up with a bunch of extra <span>s after clicking on our button multiple times.
Adding the following snippet as the last line of the createRipple function should do the trick:
ripple.addEventListener('animationend', () => { ripple.remove() });
And that's it! 😄
I hope you enjoyed this short article and perhaps learned something from it. 🙂 I love micro-interactions and I think this effect is a great way to spice up regular buttons! 😊
Until next time, keep coding (and happy coding, too)! 😁